

The next step in building out the internal network will be to add two more clients. To do this quickly, I’m going to clone my current Xubuntu virtual machine twice so I can add an HR & Finance machine as well as a Development machine. Once this is done, the office will have three departments – Sales, HR & Finance, and Development. There will only be one client in each department, but for the sake of this project that is all I will need.
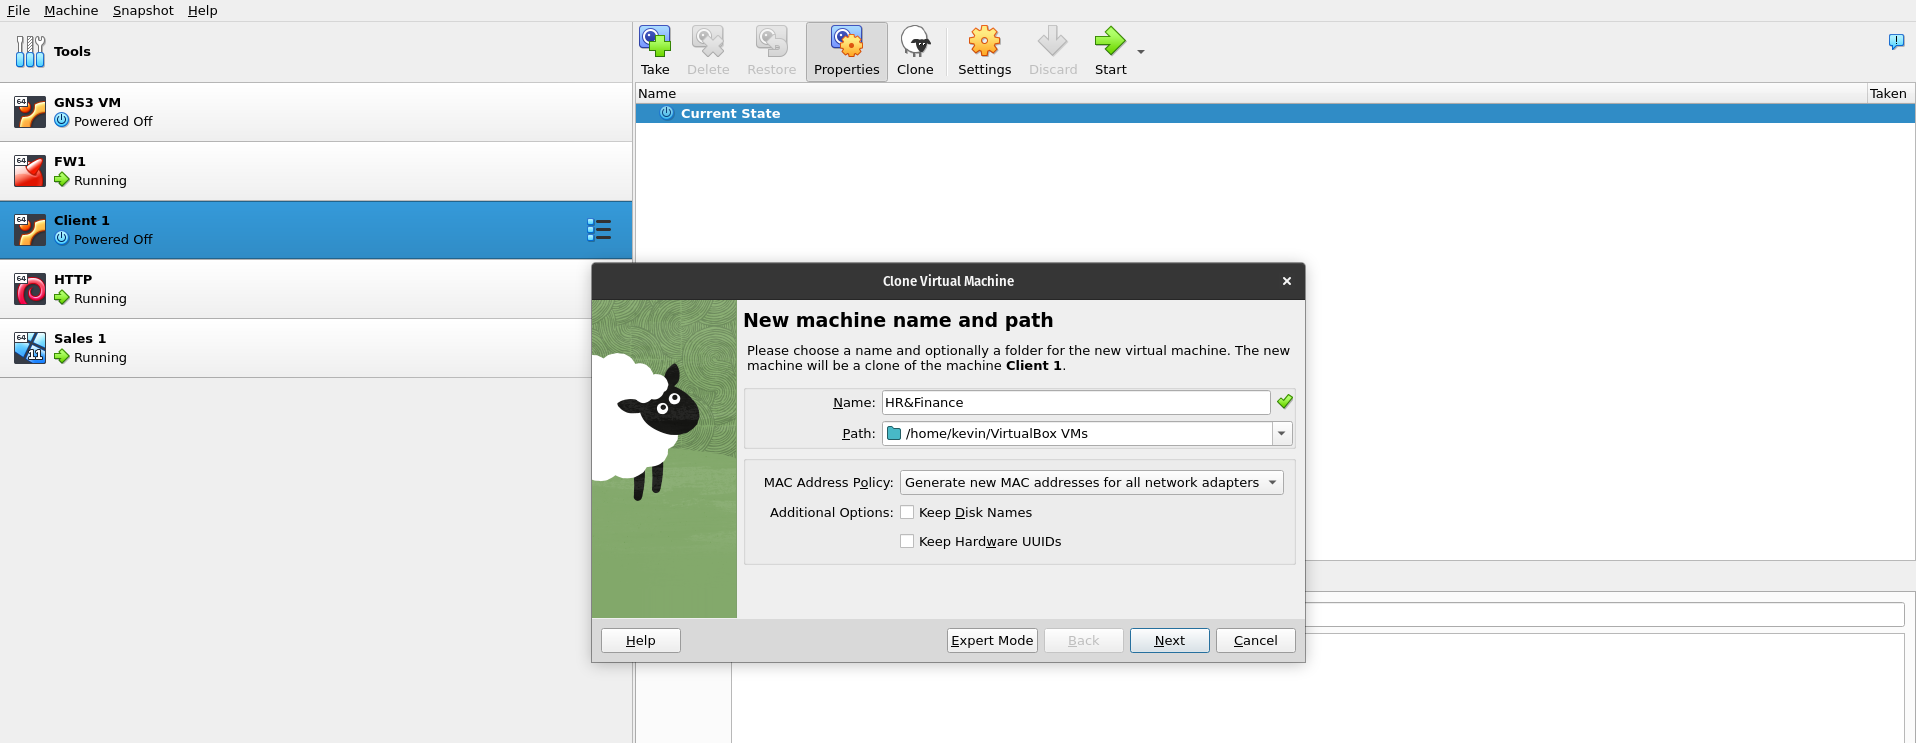
To clone my existing machine, I’ll need to shut it down. Right click on the machine in VirtualBox and select clone:
Change the name to the one you want, in my case I called this machine HR&Finance. Make sure to select ‘Generate new MAC addresses for all network adapters’ under MAC Address Policy. This will make sure there are no duplicate MAC addresses on the network. Click Next:
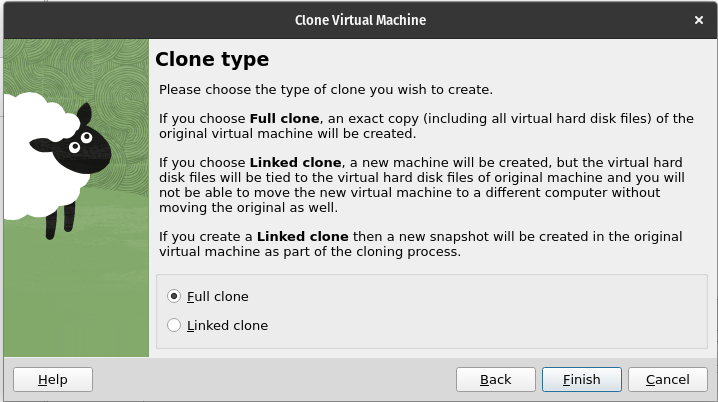
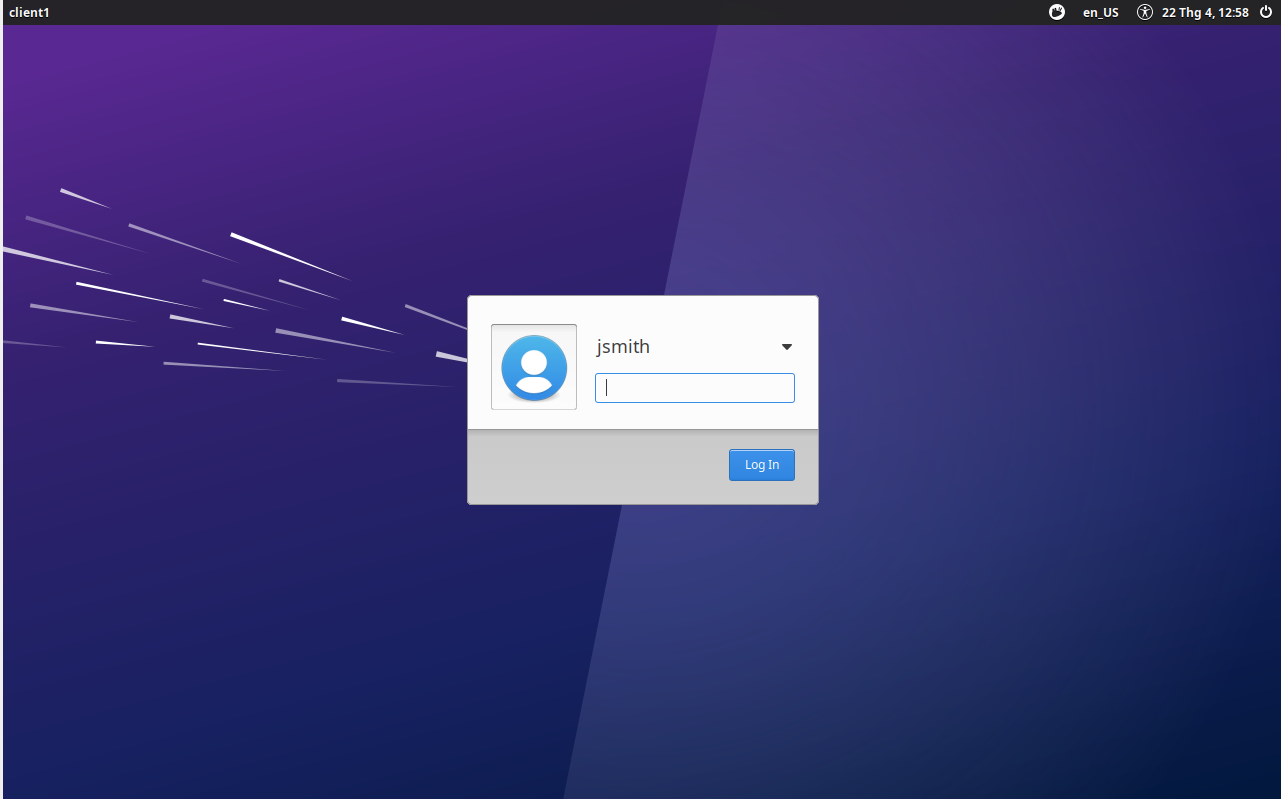
Select Full clone and then click Finish. Wait for the machine to clone, this can take a while. Once it’s done, start the machine. You will notice that the login screen still has the user JSmith because this is the user from the client I cloned:
Seeing as JSmith is our Network Administrator, I’m not going to change or remove this user as they have root privileges and a real administrator would need this account to make changes. Instead, I’ll add a user named Tina Johnson who will be the new HR & Finance Manager. To add a user open the terminal and switch to the root user:
sudo -i
It will prompt you for the root password (JSmiths password). Enter the password and you will see that the user has been changed to root:

Now I’ll add the new user:
sudo adduser hrfinance
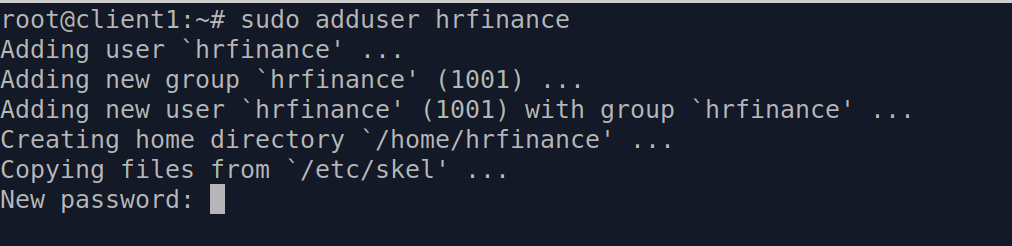
Enter a password for the new user and add their information (I’ll add a name and leave the rest blank):

Hrfinance is now set up as a standard user. The account has no special privileges. To switch to the new account log out of the machine and log back in, or simply use:
su hrfinance
Lastly, I’ll change the hostname of this machine. It’s a clone of the Client 1 (Administrator) machine, so it will have the same hostname. This could get really confusing, so I’ll change it. To check the hostname of the machine, simply type:
hostname

To change the hostname, I will need root level privileges, which the new user doesn’t have. So I’ll need to switch user to a user with root privileges, which in this case is the Network Administrator:
su jsmith

Next, I’ll change the hostname to hrfinance using:
hostnamectl set-hostname hrfinance

Done. Now this machine will be easily recognizable on the network. Next, I will go through this process again to create a Development client. I’m not going to show it here, to do it yourself just repeat the steps above.
Before leaving this machine, I will make sure it’s up to date by running:
apt update && apt upgrade -y
In the next part of this project, I will be setting up a Windows 2022 server for the internal network.


