

Now that the network is segmented, the next crucial step is to add a Domain Controller and set up Active Directory. A Domain Controller (DC), powered by Active Directory (AD), provides a Network Administrator with a centralized platform for managing users, computers, and security policies. This setup allows administrators to implement policies that ensure the network remains secure and consistent, even during times of exponential business growth.
For this project, it is assumed that the small business will experience significant growth. Therefore, it is necessary to establish robust policies that will allow the business to easily add new departments, computers, devices, and employees to the network securely and efficiently.
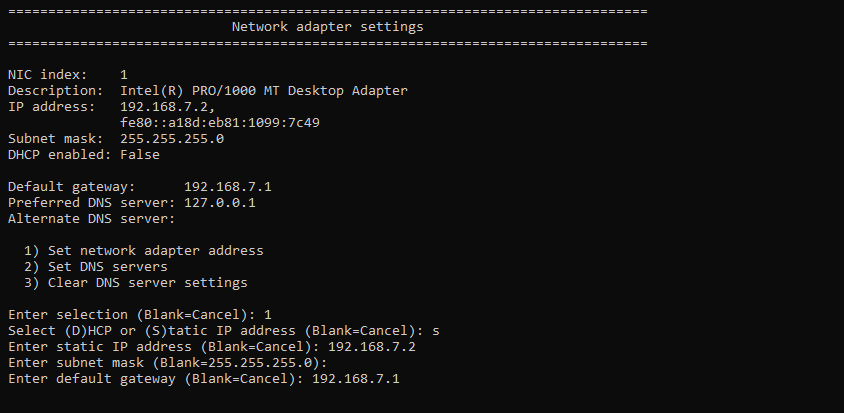
Before setting up the DC I need to make sure that the server has a static IP address that is outside of the DHCP pool. A static IP means that all other machines on the network know exactly where to find the DC, which improves network stability and guarantees that the critical services it provides are always available.
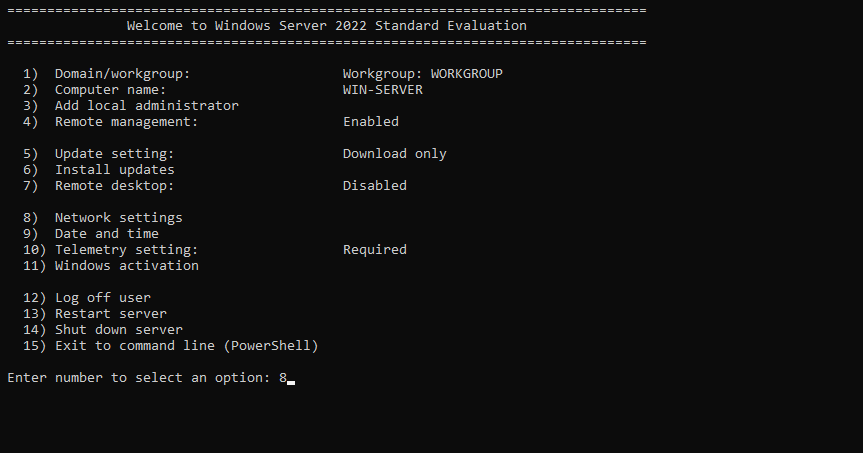
To set up a static IP, head over to the server and in sconfig select 8 to set up the network adapter:
Next, select the relevant network adapter (I’ve done this already, so mine is set up):
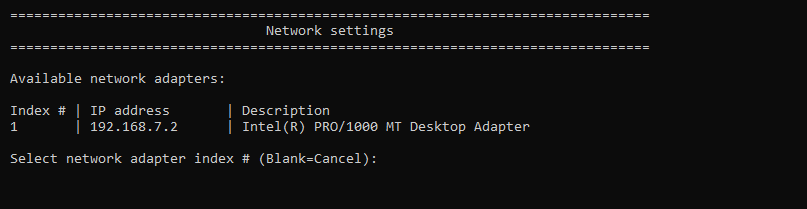
In my case, I’ll select number 1. I’ll select 1 again to Set the Network Adapter Address:
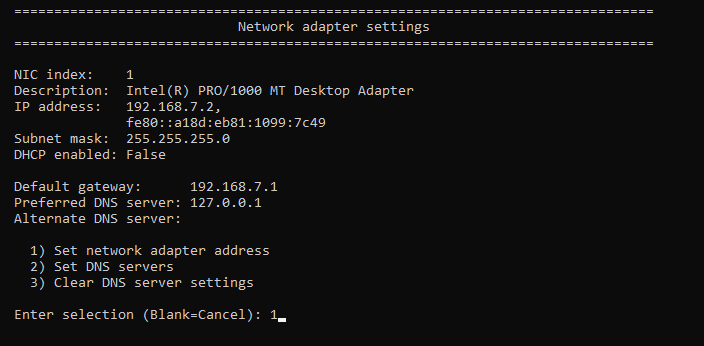
Select ‘S’ for Static IP and enter the IP you want. I’ll be using 192.168.7.2:
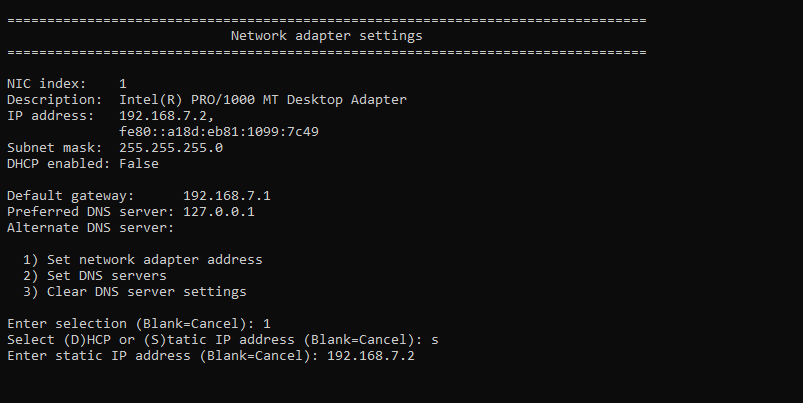
Leave the subnet mask blank and hit enter, and then enter the default gateway. The default gateway here is 192.168.7.1:
Hit enter to finish the process and return to the sconfig menu. Select 15 to enter Powershell and begin the installation. To setup this server as a DC, I need to install the Active Directory Domain Services (ADDS) package. The command for this is:
Install-WindowsFeature AD-Domain-Services -IncludeManagementTools -Verbose

Wait for the installation to complete:

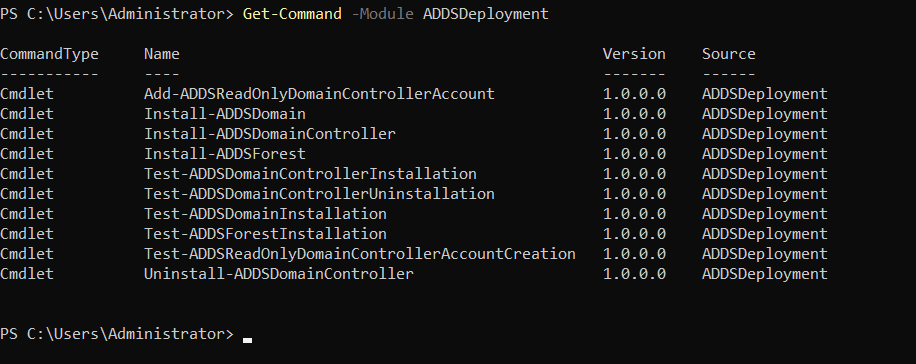
Once the installation is finished, check what cmdlets are available:
Get-Command -Module ADDSDeployment
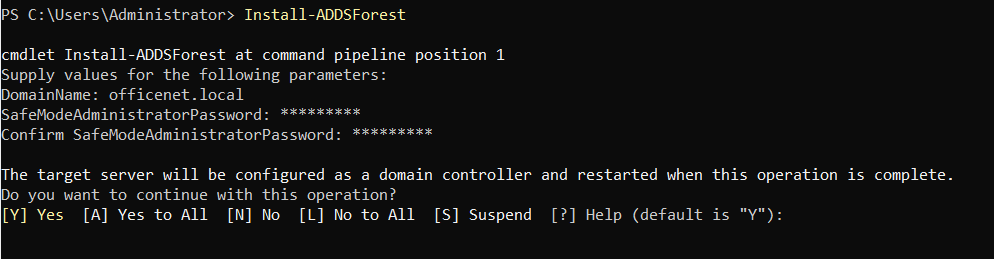
This is a fresh installation, so I’ll need to install ADDS Forest:
Install -ADDSForest
It’s going to prompt you for some information.

Enter the name you want for your domain. Mine will be officenet.local. It will then ask you to enter a password. This will be your main administrative password for the DC so make sure it is very strong. Once done, it will ask you if you want to continue. Select A for ‘Yes to all’:
Wait for the installation to complete. Don’t worry about the yellow warnings that may come up:

Once it is finished, it will ask you to reboot. Reboot the system and login using the password you just set up:
![]()
Once you’ve logged in, you will see in the sconfig menu that the domain has been changed:

Done, the DC and AD are now installed and ready to go.


