

Now that I have the web server up and running, I need to move it into its own section of the network. The server will sit inside a Demilitarized Zone (DMZ) or Screened subnet. The purpose of the DMZ is to isolate the web server from the rest of the office network. The web server is going to be accessible by the public from the internet, so it needs to be secured so that anyone accessing it is not able to access the internal network as well.
To setup the DMZ, access the pfSense WebGUI and navigate to Interfaces > Assignments:
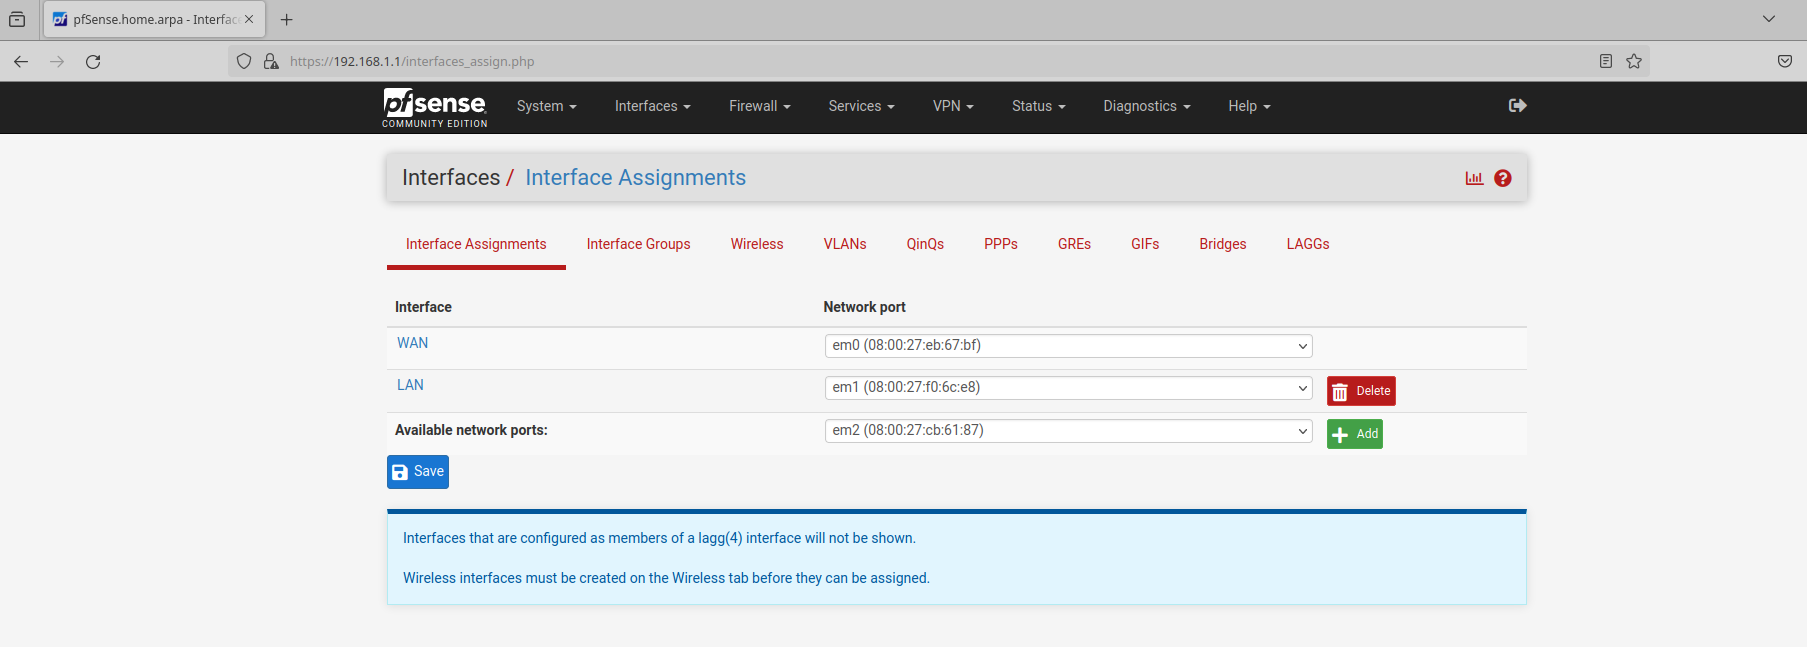
Two of the Network Adapters that were set up earlier are assigned and working. The first adapter is set as the WAN connection which gives the firewall its internet access. The second adapter is set as the LAN connection which the Administrator machine and web server are currently connected to. I need to separate the web server from this LAN network and put it on its own network. To do this, I need to setup the third network adapter.
Make sure that em2 is selected, as above, and click the add button:
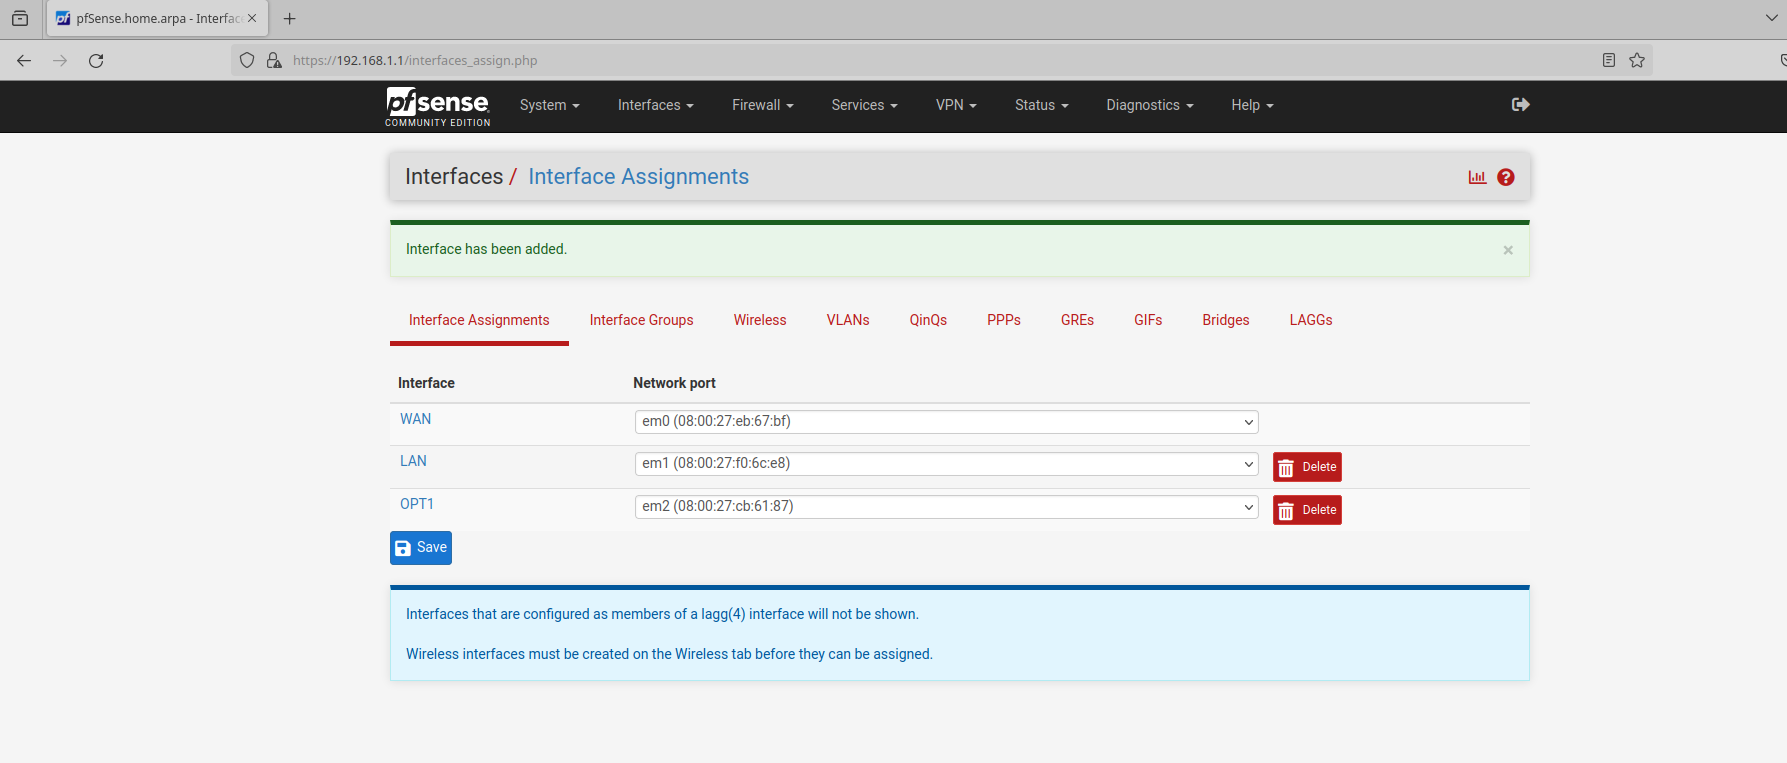
Once added, the new interface will be given the default name of OPT1. This is meaningless to my setup, so I want to change this to DMZ. To change the name, click on OPT1 or select the Interfaces menu and select OPT1. Change the description to the name you prefer and make sure ‘Enable interface’ is checked:
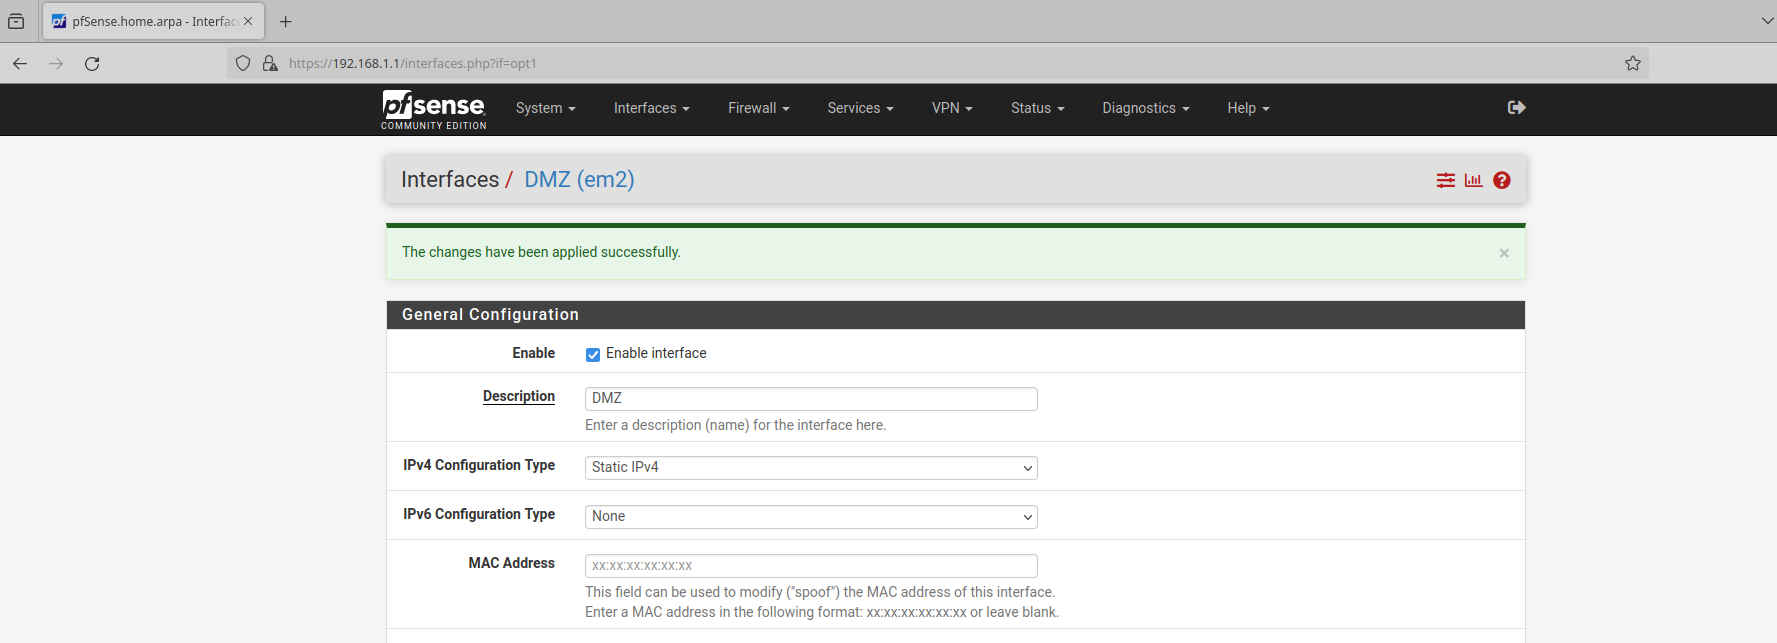
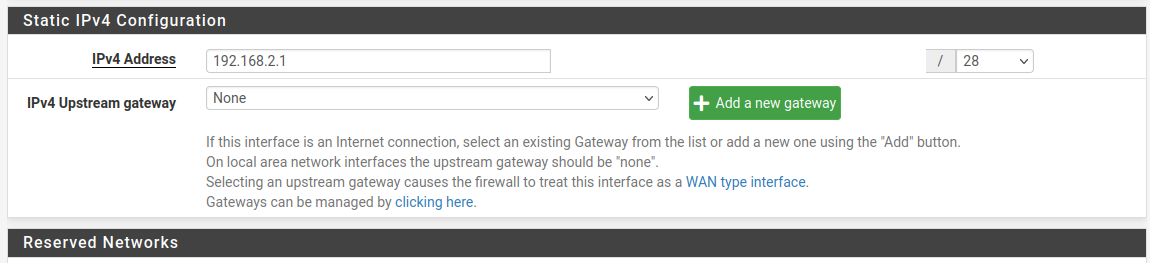
Now, I need to define the subnet for this network. Under ‘IPv4 Configuration Type’ select Static IPv4. Scroll down to the Static IPv4 Configuration section and enter your desired IP range with a new subnet. My internal network is setup as 192.168.1.0/24. For the DMZ I’m going to use 192.168.2.0/28. I went with 28 because in reality a business like this may expand and I feel a subnet that can support 16 IP addresses will give it space to grow:
Click Save and Apply Changes:

The DMZ is ready to go, now I just have to move the web server into it. To do this, make sure that the web server virtual machine is shutdown.
In the pfSense WebGUI navigate to Services > DHCP Server. Select DMZ:
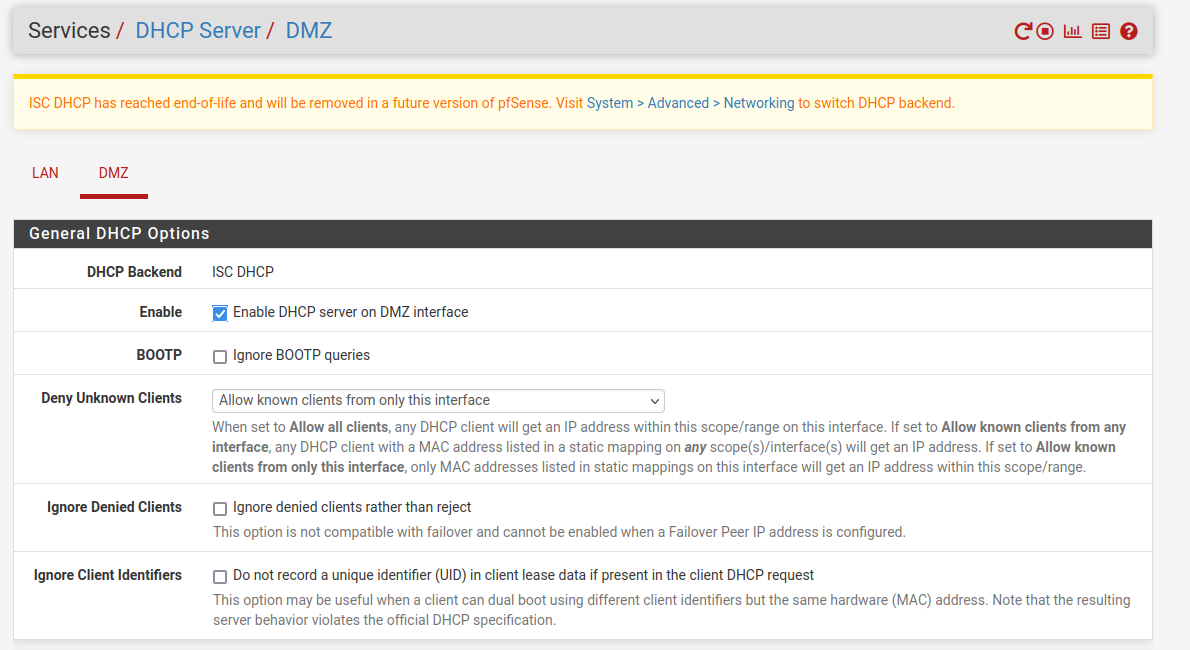
Make sure ‘Enable DHCP server on DMZ interface’ is checked. The Dynamic Host Configuration Protocol (DHCP) is a protocol that automatically assigns IP addresses to machines connected to the network. To have the server automatically receive an IP upon boot, this option needs to be selected. Under ‘Deny Unknown Clients’ I’ve selected ‘Allow known clients from only this interface’ because I only want this single machine to access this interface.
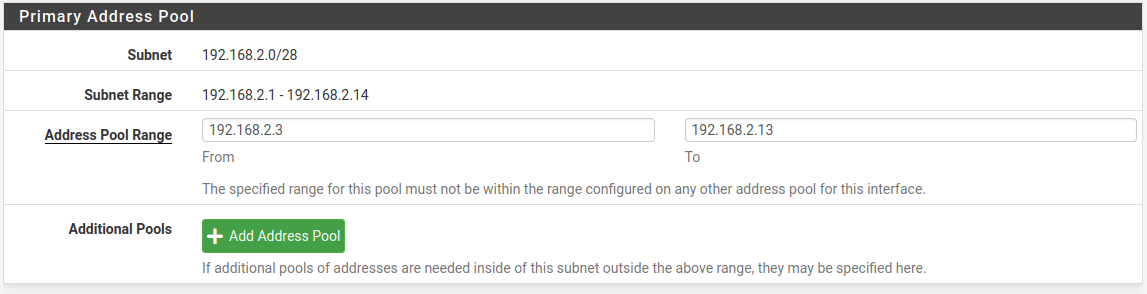
Next, I need to define the ‘Address Pool Range’ for the DHCP server. I’m going to choose 192.168.2.3 – 192.168.2.13:
Now, I need to make sure that the web server is ‘known’ to this interface.
To do that, I need to get the web servers MAC address and add it to the static mappings on the DMZ interface. To get the MAC address open the web server and use the command ‘ip address’. Look for the ‘link/ether’ line under the adapter and you will see the MAC address there:

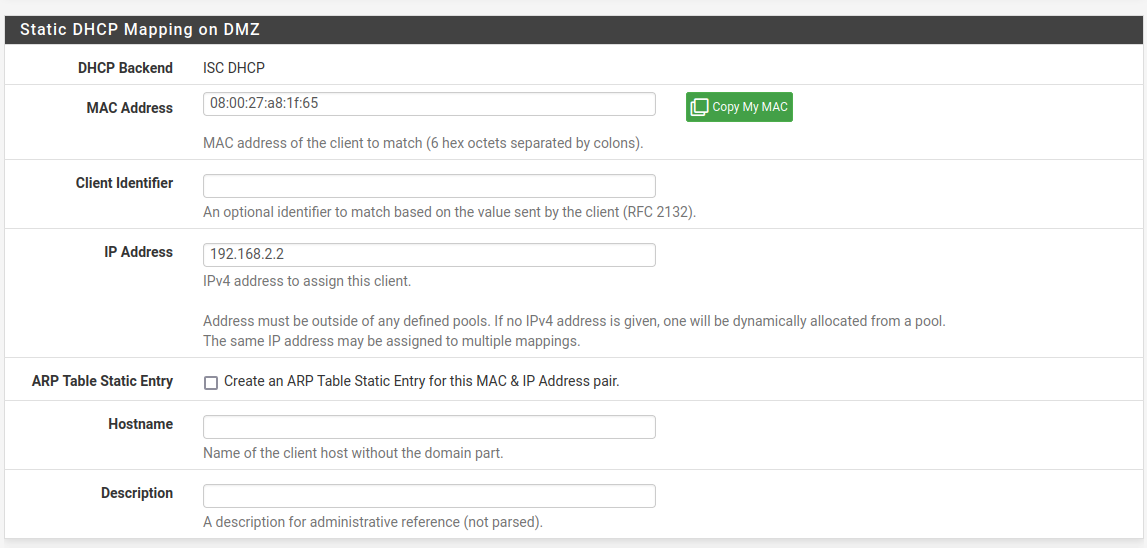
Back in the pfSense GUI, scroll down to the bottom of the page and click ‘Add Static Mapping’:

Enter the MAC address of the web server and select an IP Address to assign to it. I chose 192.168.2.2. Note that this IP can not be within the pool assigned earlier:
Click Save and Apply changes as before:

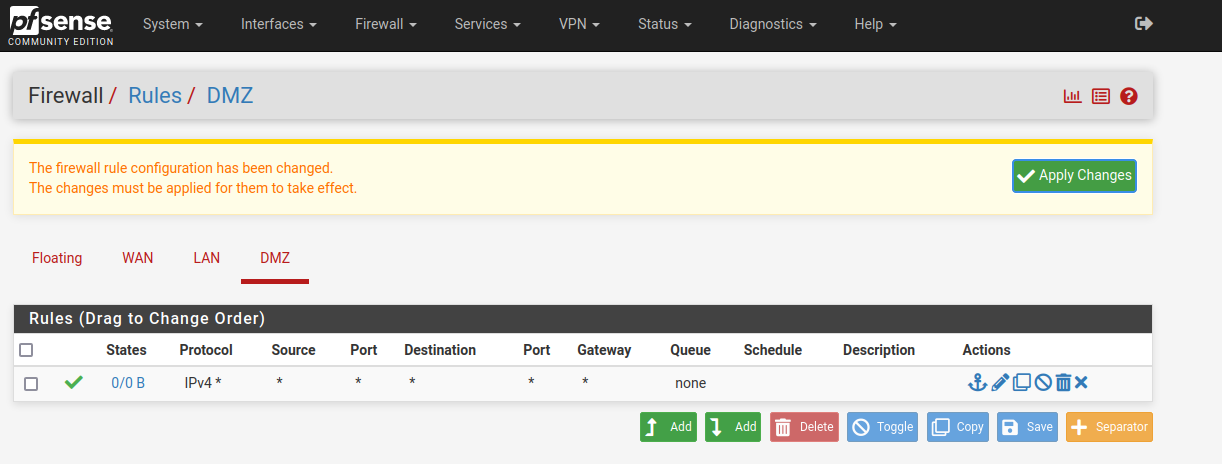
Finally, I need to make sure that traffic can flow from the DMZ to the internet and vice versa. In the pfSense WebGUI navigate to Firewall > Rules and select DMZ:
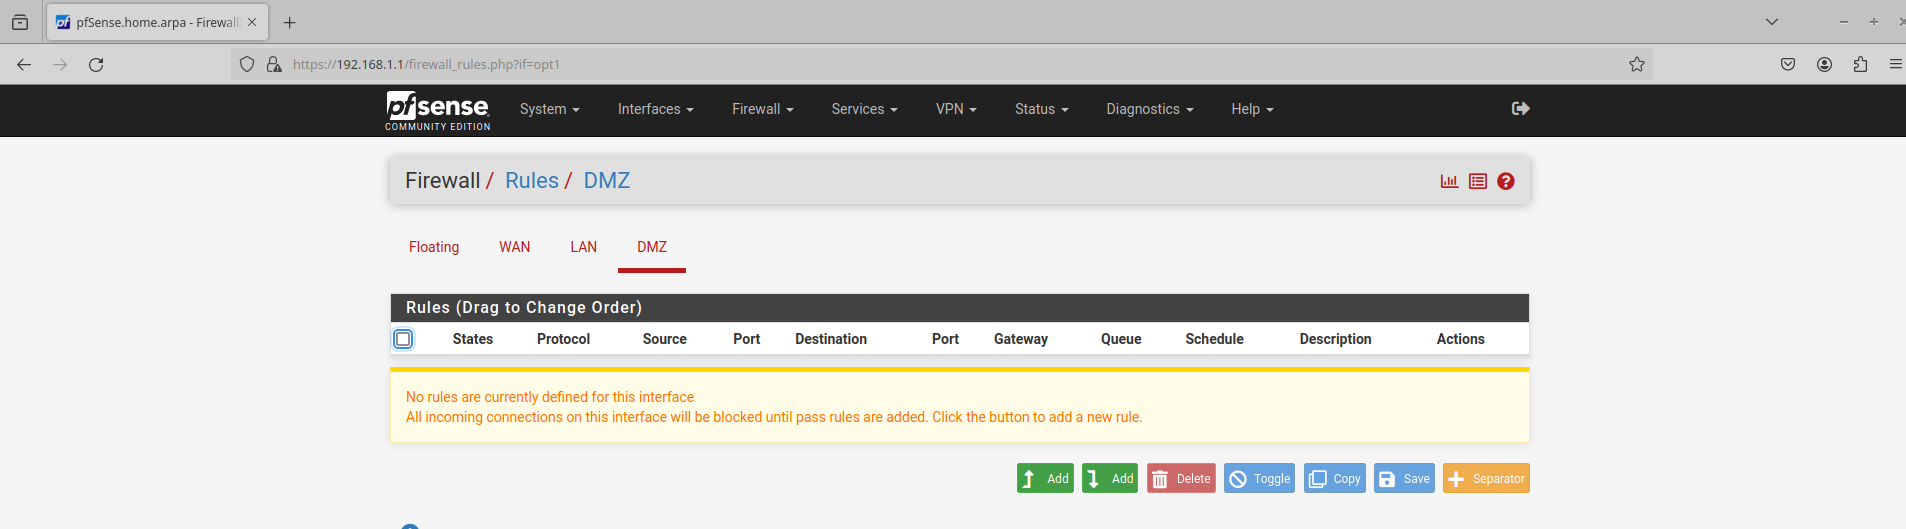
Currently, there are no rules set which means that all traffic is being denied. Click the Add button with the up arrow (It just means the rule will be added to the top of the list):
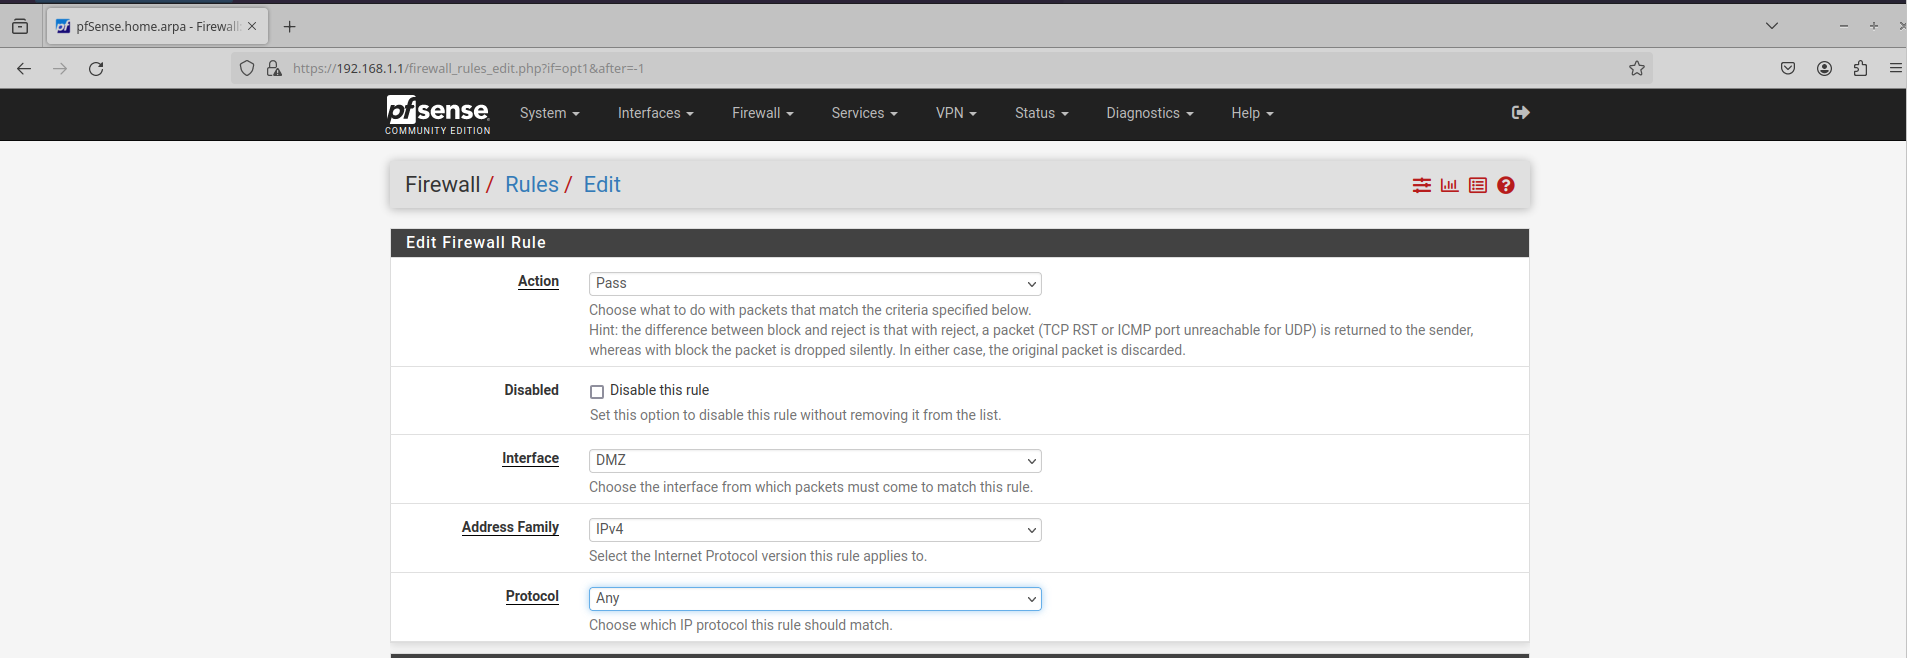
For now, I’m just going to add a rule that allows all traffic to and from this server. This is NOT SAFE at all in the real world, and I will be changing this later in the section on firewall rules. As above, make sure the ‘Action: Pass’ is selected and that the interface is set to DMZ. Set the protocol to ‘Any’ and click Save and Apply changes:
Finally, I can boot up the web server and check whether it is being assigned the correct IP address:

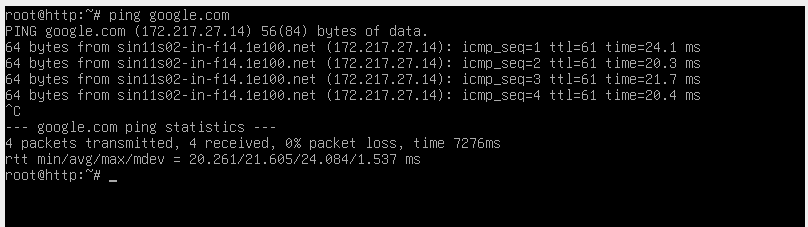
Perfect! The web server has now been placed in the DMZ and separated from the rest of the network. The last check I need to make is to verify that the web server is able to connect to the internet. A simple ping of google.com can confirm this:
I still need to setup the firewall rules for the server so that the DMZ functions as it should, but that will come later in the firewall rules section of this project. For now, I will move on to setting up a website on the web server.


